 ) at the top of the page. A menu of
Views options will be displayed.
) at the top of the page. A menu of
Views options will be displayed.A Parent-Child view is a type of view that is only available in Grid Displays; it is not available in Calendar or Chart Displays. A Parent-Child view allows you to display the contents of two or more related CorasWorks views at once. One view is defined as the parent view and at least one view is defined as a child view. They must share at least one column of common data. You can also have multiple child views and/or grandchild views. Each view must be created in the Data Display before the Parent-Child view can be defined.
For example, you could start by creating a view that displays all of your customers. Then you could create another view that displays all of the products that your customers have purchased. You could combine these two views into a Parent-Child view, setting the customer view as the parent and the product sales view as the child. Then, the Parent-Child view will show all of the products that each customer has purchased indented below each customer. If you wanted to take it a step further, you could add another child view that shows contact information for each customer, or calls made to Support by each customer.
When identifying the views to include in the Parent-Child view, you identify the key column in each view that contains the common data. Several properties, such as display columns, filters, sort order, and conditional formatting, are carried forward from each of the source views that you choose to include in the Parent-Child view. Other properties are defined in the Parent-Child view as described later in this section. The results are displayed in a Grid.
In addition, the actions that are available in each of the source views are available in the Parent-Child view. Any action that can be executed against an item in an Active Display can also be executed against an item in a Parent-Child view.
When creating a Parent Child view, the first requirement is to have at least a pair of regular views to use as the parent and child views, respectively.
The only requirement with the views is they need to have a common column between them. That is, there needs to be a set of columns in the views that can be used as keys so that the item selected in the parent view can be matched to an item in the child view.
Within the main page of the Display Wizard, click on the
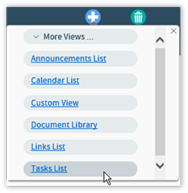
Create View icon ( ) at the top of the page. A menu of
Views options will be displayed.

Within the menu, choose the Custom View link. The new
View will appear in the Visible Views section. Click on new View’s
Quick Edit icon  :
:

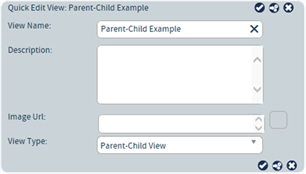
In the resulting Quick Edit View, rename the View and provide a description. Most importantly, in the View Type section select Parent-Child View.

Once the View has been named, click on the Edit View icon
 to be taken to the pages for editing the
View’s configuration.
To edit the settings for the Parent-Child View, click on the
Edit View icon  to be taken to the pages for editing the
View’s configuration.
Along the left-side of the Editing View page is a single option: Setup. The Setup page is used to identify the Parent view, the Child view(s), and their relationship.
To start, select the Parent View. In the Parent View drop down on the right-side of the page, choose the view that will be initially displayed to the user. This is the Parent view and the user will click on an item within the view in order to see its child view (s).
After selecting the Parent View, look to the left for the Available Views listing. These are the views within the component that can be added as children. Drag the view from the Available Views section and drop into the Child Views section.
Next, you need to identify the column in each view that contains common data (e.g., customer ID number, project name, etc.). This is the column that will be referenced to “connect” with the child list, and contain a matching value in each of the key columns. To do this, highlight the child view and select the key column in the parent view from the Parent Key Column drop-down. Then select the key column in the child view from the Child Key Column drop-down.
At this point, you can be finished identifying the parent and child views, or you can add additional child views. .
•To add another child view, drag the view from the Available Views section and drop into the Child Views section.
NOTE: To improve performance, CorasWorks recommends that you try to limit the number of items returned by the Parent-Child view. As with any type of view, the more data you include, the longer it will take to display results. It is also recommended that whenever possible, you apply a filter to the source views referenced in the Parent-Child view.
When selecting the Parent Key Column and the Child Key Column, please keep these points in mind:
•The names of the Parent Key Column and the Child Key Column do not have to match; only the value stored in the columns has to match.
•The names of the key columns can include a hyphen. However, these special characters are not supported for key columns: #$*&
•The parent/child relationship should be one-to-many. The values in the Parent Key Column should be unique.
•Either a single line text column or a numeric column should be utilized as the key column. Calculated columns and lookup columns are not supported for use as key columns.
•The key columns must be shown in the display, as defined on the Column Definition page on the source views.