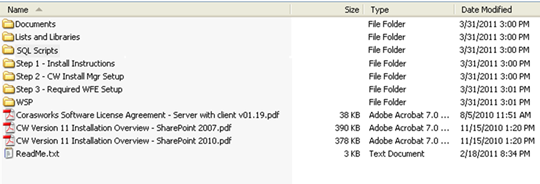
Figure 4: Select “Step 3”
Folder
1. Open the Step 3 – Required WFE Setup folder, right-click on the CW_Components_Setup executable file, and choose to Run as Administrator. This is done on all web front end servers (and the Central Administration server, if different) to load the necessary DLLs and resource files onto the server(s).
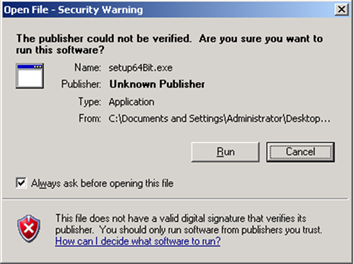
2. If a warning message like the one shown below is displayed, select the Run button.
Figure 5: Warning Message
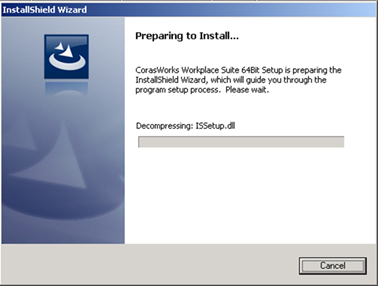
Figure 6: InstallShield
Wizard
3. In a few moments, the InstallShield Wizard will open, displaying an instructions window.. Read through the instructions, select the top radio button, and click Next.
4. Read the license agreement, select the top radio button to accept it, and click Next again.
5. Provide your user name and company name on the next window. Click Next.
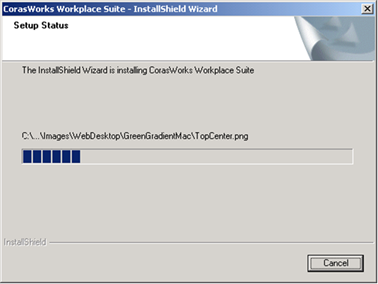
6. A status window like the one shown below is displayed. When the installation has finished, an “InstallShield Installation Complete” message is displayed. Click Finish.
Figure 7: Setup Status
Window
In the next section, the solution files are deployed.
1. If the CorasWorks Installation Manager is not already open, open it from within the following Start Menu location. Be sure to right-click on the application and choose to “Run as Administrator” (even if already logged in as an administrator)
Start >> Programs >>
CorasWorks >> CorasWorks Installation Manager
2. The System Check page is displayed. If all of the tests stated on this page are successful, a message is displayed and a Continue button is shown at the bottom of the page. If you do not want to see this page the next time you access the Installation Manager, place a mark in the checkbox at the bottom of the page to Automatically continue after success. The tests will still be performed regardless of whether or not this checkbox is selected, but it will be done behind the scenes.
3. Click the Continue button.
•If this is not the first time you have accessed the Installation Manager,
the welcome window is not displayed. Instead, you are brought to the page shown
in Figure
8 (next page).
If no solutions are shown on the Install tab,
click the Manage Search
Folders button located near the top right of the window, then browse to
locate the components you want to install. Proceed to Step 4.
4. Next, you should see the Installation Manager Install tab displayed as shown below (next page). You are prompted to select the scope you want to work with. If you do not see any solutions on the right hand side of the window, you can add them manually:
•Click Manage Search Folders and then select Add Folder
•Browse to the location where you extracted the zipped v11 files, locate the WSP folder and click once to highlight, then click OK.
5. On the left side of the window, there are two buttons labeled Web App and Farm. Use one of these buttons to define where you want to install the v11 components.
•Recommended: If you want to install v11 globally on all available web applications, select the Farm button.
•If you want to select the individual web applications where v11 should be installed, select the Web App button and then highlight each web application you want to work with.
|
NOTE |
You can verify that the desired web app has been selected by viewing additional information about the web app near the bottom of the window. When highlighting a single web app, the following information is provided: •Application name o If you have changed the application description in IIS, it will not be reflected here because the Installation Manager gets the application name from SharePoint Central Administration •Site count •URL •Port •Host name |
Table 4: Verifying Web Application
6. On the right side of the window, place a check mark next to each component that you want to install. If you place a check mark next to an upper level item, all of the components listed under it will be selected automatically.
•Note that if you select an individual component, its Title, Description, Version, and ID number are displayed at the bottom of the screen. If you cannot see the entire description, you can resize the window.
•The application wizards and other common components (Actions Wizard through Master Page Display Wizard) are installed at the farm level, even if you select individual web applications in Step 5.
•If you selected an individual web app in Step 5, each component name on the right side of the page is followed by one of the informational values listed below. If you set the scope to Farm or have selected multiple web apps, these values are not displayed.
o Install – This is a new installation of the selected component; it does not currently exist on the selected web application. Components are identified using the ID number at the bottom of the window.
o Repair – This same version of the component is already installed on the selected web application. If you proceed with the installation, the Installation Manager will uninstall the currently installed component and then reinstall it using this WSP in the folder identified in Step 5.
o Upgrade – The Installation Manager recognizes that a version of the component is already installed on the web application, but the existing component’s version number is not as high as the one you have chosen to install.
o Downgrade – The Installation Manager recognizes that a version of the component is already installed on the web application, but the existing component’s version number is higher than the one you have chosen to install.
NOTE: Basic component WSPs can be deployed to individual web applications without affecting the entire web farm. Basic Wizards and Advanced WSP deployments must be farm wide and will write to the web.config file for every web application in the farm. If your organization does not allow farm wide deployments, simply deselect any items in the Advanced folder of the installation package.
7. Remove the checkmark from the Reset IIS option.
•A restart is required to remove the DLLs from memory. However, CorasWorks recommends that you reset IIS manually once the installation and deployment of all solutions is complete, as leaving this option selected can result in deployment delays due to the fact that the IISRESET may restart some or all of the app pools.
•You can manually restart IIS by opening your command prompt as an Administrator and executing the “IISRESET” command. This should be completed after the compete install (or uninstall) of v11.
•If you leave the Reset IIS option selected, once the components are installed, the Internet Information Server (web server) will be shut down and restarted without rebooting the physical server.
8. The Deployment Interval in Minutes property is used to identify the number of minutes the Installation Manager should wait between each of the processes for each component. CorasWorks recommends that you set this property to 0 and then increase it if needed.
9. When you are ready to proceed with the installation, click the Install button at the bottom of the window. A progress window like the one shown here is displayed.
10. Once the Installation Manager has installed the components into the Solution Store and has created the timer jobs to deploy the components into the web application, the progress window states All operations successfully completed and OK and Close buttons are displayed.
•Click Close to close the window.
•Click OK to close the window and open Central Administration to review the deployment process.
11. If you click OK, the Central Administration Solutions Management page will open in a browser window. Refresh the page to track the status of the SharePoint deployment process. If the deployment does not seem to be progressing, it may be necessary to restart the Timer service(s).
12. Once the deployments are completed, return to the Installation Manager, go to the Manage tab, and click on the Update Web.Config button. This step (which may be repeated) confirms that the web.config entries for the CorasWorks components have been written to all web applications.
13. Restart the application pools that were stopped at the beginning of the installation process.
14. Test the v11 components within SharePoint.
|
NOTE |
The SharePoint Solution Manager stops and restarts the SharePoint Timer Service each time a solution is deployed. You may want to check the Timer Service to make sure it has been restarted. Also, if you notice the deployment "hanging" at a particular spot, check the Timer Service on each of your front end web servers. |