
By default, there is one page listed: Home. Pages need to be created before being available for adding into the navigation.
1. Click on the “New Page” icon to open the “Add Content” panel.
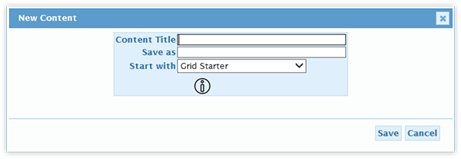
2. Within the New Content panel, complete the following fields:
•Content Title: Title as it will appear within the Pages widgets section.
•Save as: File name for the page. No file extension is needed as the ASPX file extension is automatically applied.
•Start With: Choose the type of page to be created:
•Blank page: a blank web part page;
•Starter Pages prepopulated with components:: Calendar Widget, Calendar Starter, Announcement Widget, Grid Widget, etc.;
•Local Pages: Pages listed in the Pages Widget listing. This allows the creation of new pages based on ones created specifically as Widgets within the current application.
•Page Default Image: click on the icon located under the “Start With” section. A panel will load, showing a selection of icons. Click on an icon to select one for the page. The selected icon will become the default icon for the widget when it is added into the Navigation (where it can be changed).
3. Click on the Save button to save the page. When the panel goes away, the new page will appear within the Pages section.